


How's that for a title?!
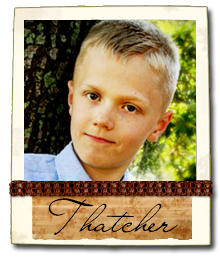
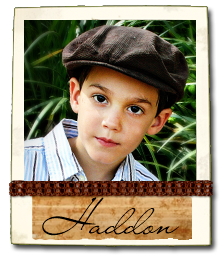
I have not blogged about homeschooling per se in a very long time. I've posted Easter, birthday and strawberry pics, talked about our butterfly garden experience (We have two more caterpillars almost ready to pupate as I type this!), shared our homemade bread recipe, our detox and just about everything else other than the nuts and bolts of homeschooling. What's been missing this year are Weekly Reports, any talk about curriculum, thoughts on the 2009-2010 year (Thatcher's 3rd and Haddon's K4) , planning and the like.
Why? To be honest, I am not really sure. This year has felt like the equivalent of a ship at sea whose lost its rudder. Sure there are still sails to catch the wind when it picks up but there are days and even weeks when the wind is just barely blowing.
Those who have been reading for awhile have followed my journey this year. I know there are new readers so I will quickly recap. Last June we found out we were expecting Baby #4 and a pretty good case of morning sickness and exhaustion set in. September saw Hurricane Ike run right over the top of our house. At the end of October we lost the baby; surgery and a long recovery followed. Holidays, a new roof , a million calls to two insurance companies who both messed up our claims (home and health) and an official diagnosis of Asperger's Syndrome finished off 2008.
The new year started, and boy was I was ready for a new beginning. I started researching Charlotte Mason's theories in earnest. I read Volume One of Miss Mason's six volume series and Cathy Levison's books by the end of the month. We started changing our school little by little because I loved and agreed with what I was reading: short lessons; we dropped grammar and logic; starting incorporating nature hikes, quality literature and living books; and made an attempt at masterly inactivity. Then I started Volume Six and realized all I had gotten us into. ;) CM is so much deeper than just good books and nature hikes (What most tend to boil it down to in my experience.) I started feeling a little overwhelmed. Can I really implement this? It just seems really hard and classical feels so much more laid out. CMer's need their own version of The Well Trained Mind!
Through all this, we have been struggling with Thatcher's increasing symptoms and two younger brothers who do everything big brother does. We decided to medicate again (We tried stimulants for a year when he was 4 1/2 - 5 1/2) because we just had to gain some control over the chaos. Then I got a call and life took another detour.
I have attended workshops at our local homeschool conference done by a Neurodevelopmentalist for the last three years. She has really great ideas for how to maximize any kid's potential and friends of mine have been successfully using some of her strategies for a few years now with their "typical" kiddos. But what she shares at her workshops is just the tip of the iceberg. You can take your child to her and she puts a plan together to help reduce and/or eliminate symptoms of many neurological conditions including autism, ADHD, learning disabilities and even Down's Syndrome. The catch though...it's expensive...and time consuming. And did I mention expensive?
Well we have friends who knew we wanted to pursue this therapy and offered to pay for our first evaluation. We went not really knowing what all to expect. We have started on a course of therapy that takes us about 3 1/2 hours a day. And this is not a short term fix. If we decide to continue, we will go back to be re-evaluated every four months. Activities will be added/deleted depending on progress. Most kids continue this type of therapy for one to two years, sometimes longer.
What it all boils down to is that this year academics have been on the back burner. I have two shelves full of books we haven't hardly touched. We are at the end of May and the only thing we've finished is our Spanish program - and that's because it's video based! We have 50 lessons to go in math, over half of SOTW 2, almost all of this year's science because we started the year finishing what was left from last year, and on and on. I have these beautiful plans that pretty much got thrown out the window.
In my head I know that it truly is okay. It's a unique season. But somehow it doesn't stop me from feeling frustrated. The reality is that I never would have been able to pursue some of the things I did this year had we stayed on track academically (butterfly garden, baking bread and making jam...). Those things have been a joy.
Yet the steam is gone. I am at burnout and have been there for awhile now. There I said it. I need the wind to pick up and to start blowing - hard! I want to regain that passion and excitement for educating my kids. The hard thing is, if we continue this therapy then academics will need to stay in the background for a year or more. It will all be worth it if it helps Thatcher reach his potential but there are no guarantees. No answers, just sharing my journey. And if you read this far, thanks! :)